Optimize Your Pottery Firing: A Complete Guide to Making and Using a Datalogger with a Thermocouple
In the field of pottery, precisely controlling the temperature during firing is crucial to achieve reproducible results and explore new glaze ranges. To achieve this level of control, using a datalogger that displays temperatures and records data for your pottery kiln is very useful. This article explains the making of this tool, from design to practical use, and the benefits it offers to potters.
The datalogger box for pottery kiln has several objectives:
- Track a firing and see its curve in real-time: Allows instant visualization of temperature variations and adjustments accordingly.
- Analyze the results after firing: By comparing temperature curves with final results, it is possible to optimize firing processes.
- Note events during firing: Record notes for future adjustments or identify specific issues.
- Have a history of firing curves: For future reference and improving consistency of results.
- Monitor firing in real-time: Ensure everything is going well and intervene in case of problems.
Necessary Components
- Arduino board: Base platform for connecting other components.
- MAX31856 module: Interface for thermocouples.
- Type S or K thermocouples: Temperature sensors.
- LED or LCD display: To visualize data in real-time.
- SD card (optional): To record data.
- Waterproof case: To protect electronic components.
- Additional Arduino modules (optional): To add features like barometric measurements.
- Raspberry Pi: For data recording, web server, database server, and data processing with Python and PHP.
Explanation of Components
Thermocouple: A widely used temperature sensor for accurately measuring high temperatures. It operates on the Seebeck effect principle, which converts a temperature difference between two metal conductors into an electrical voltage.
MAX31856: A high-precision digital thermocouple converter, designed to easily interface with various types of thermocouples. It offers high accuracy and integrates automatic cold junction compensation.
Main Features of the MAX31856
- Compatibility with various types of thermocouples: Supports multiple types, including K, J, N, R, S, T, E, and B.
- High precision: Accuracy of ±0.15% and resolution of 0.0078125°C.
- Cold junction compensation: Integrated for accurate measurements.
- SPI interface: For simple and fast communication with microcontrollers.
- Thermocouple error detection: Capable of detecting errors such as open or reversed wires and out-of-range temperatures.
- Advanced features: Includes digital filters to reduce noise and improve measurement stability.
Other Components
- LED/LCD display: For continuously monitoring the temperature from afar.
- SD card and real-time clock: For recording and timestamping data.
Simple and Affordable Solution
This solution is designed to be simple and affordable, allowing any DIY enthusiast to create their own datalogger. It relies on open-source components, with no proprietary software or hardware, and follows industry standards.
Electronic and Enclosure Assembly
- Wiring diagram: Connect the thermocouple to the MAX31856 module, then to the Arduino or Raspberry Pi.
- Display: Connect a LED or LCD screen to display real-time data.
- Storage: Integrate an SD card for data recording, with a real-time clock to timestamp the recordings.
Enclosure Design
- Waterproof case: Ensures protection of components against dust and splashes.
Programming
Arduino Program
- Reading data from the thermocouple: Use the MAX31856 module to read temperatures.
- Displaying data: Send the data to the LED/LCD screen.
- Recording data: Write the data to the SD card with timestamping.
Raspberry Pi Program
- Python and PHP: For managing, displaying, and analyzing data.
- GraphJS: For visualizing temperature curves.
- Database: To store and organize data.
Installation and Configuration
- Raspberry Pi configuration: Installation of necessary software, network configuration, and modules.
- Database: Setting up a MySQL database to store temperature data.
Conclusion
The pottery kiln datalogger is an essential tool for any potter wishing to improve the quality and consistency of their creations. Thanks to an open-source and affordable solution, it is possible to monitor and analyze firing cycles in real-time, allowing precise adjustments and a better understanding of firing processes.
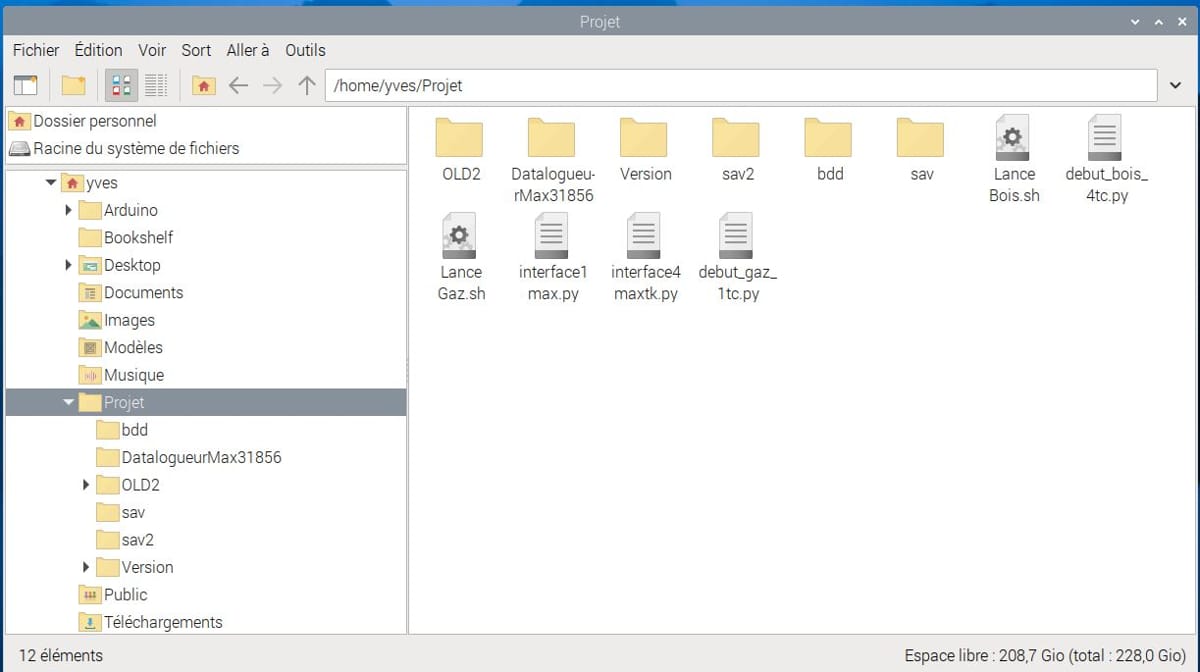
Data Logging Procedure
Logging script: On the Raspberry Pi, a .sh script launches the Python program to record data.
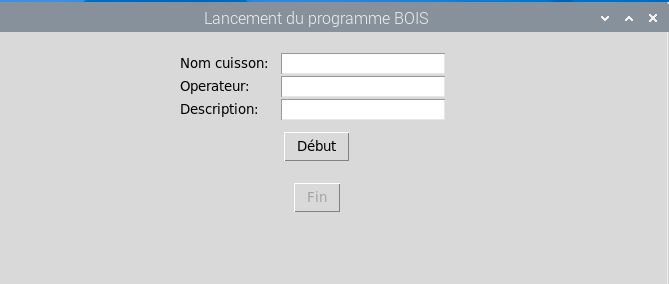
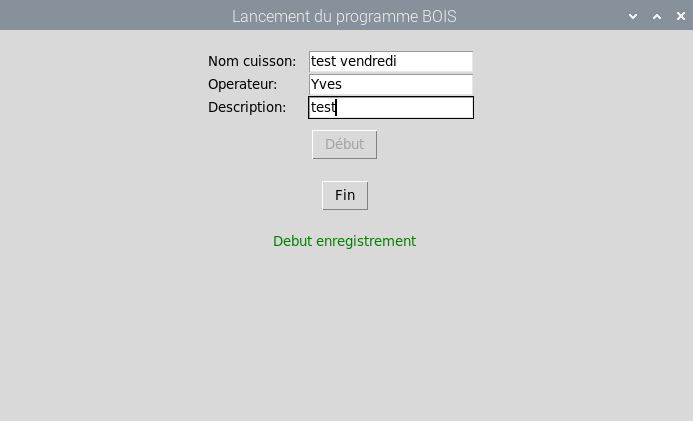
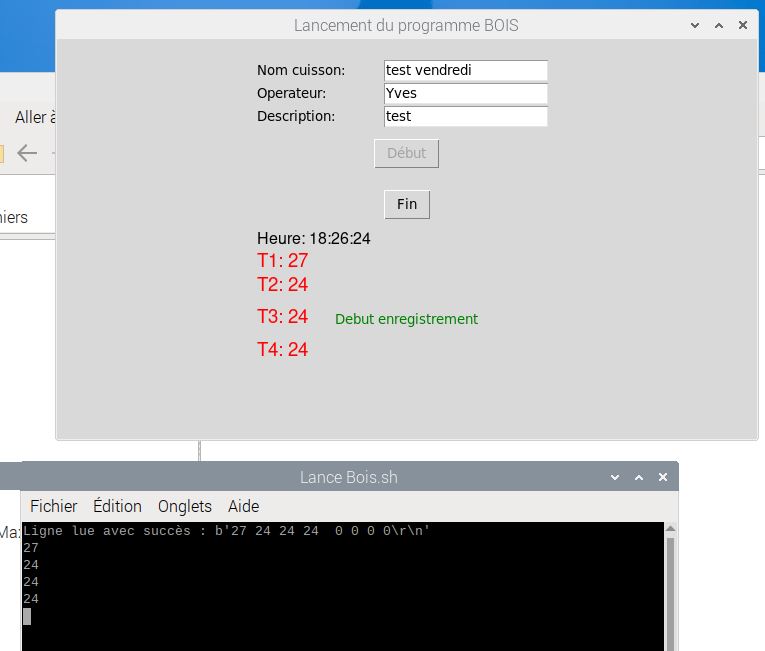
User interface: Enter the firing name, operator, and description, then start recording.
Real-time tracking: A terminal window displays progress and any errors.
Web access: By accessing the Raspberry Pi's IP address via a browser, you can view data and temperature curves.
Since it is a web application, you can access the datalogger's web page from any device connected to the same network. This means you can use your phone, tablet, or computer to see real-time temperature data as long as these devices are connected to the same Wi-Fi network as the datalogger.
You can access your datalogger's data even when you are not at home by configuring your internet box to allow access.
Web Interface Features
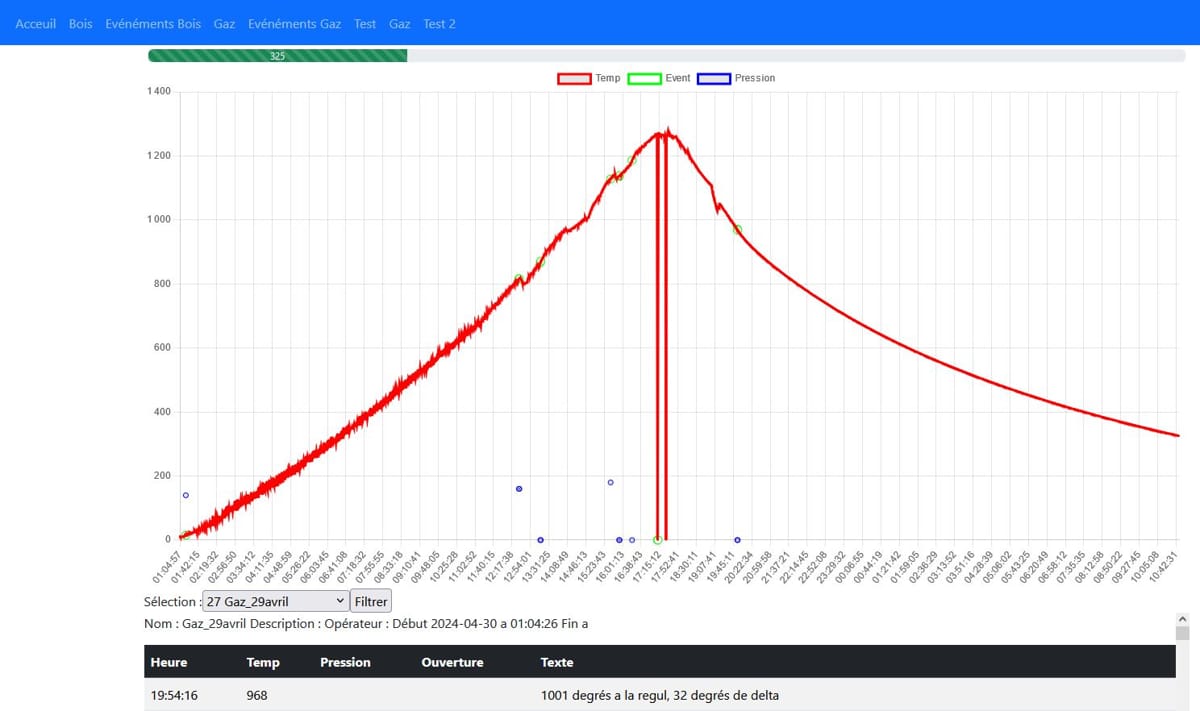
Home screen: General presentation of tracking options for wood or gas kilns.
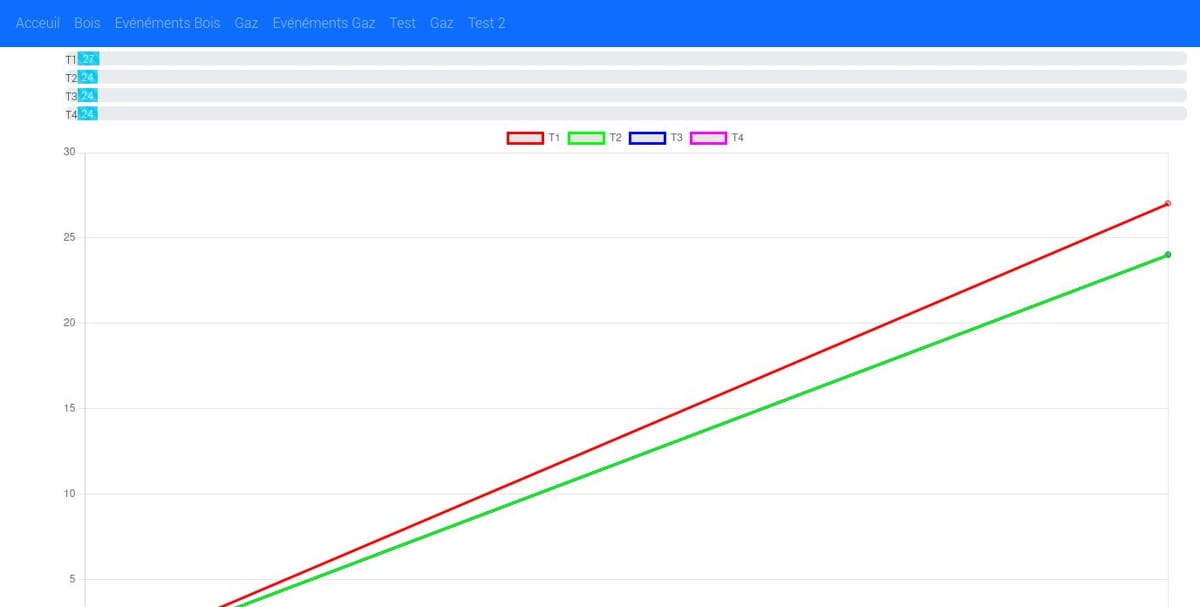
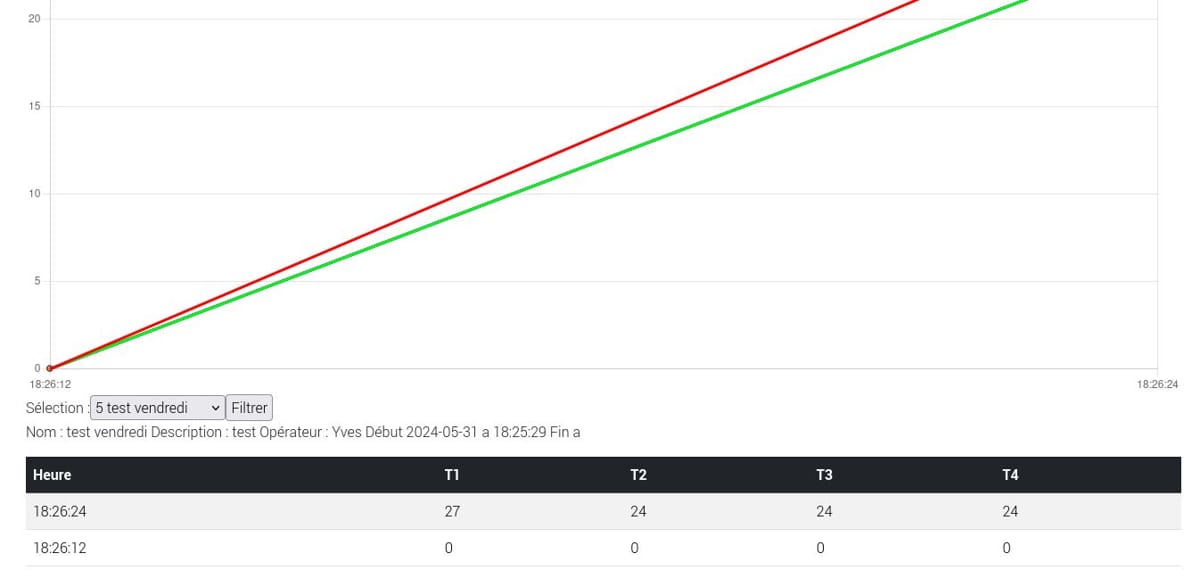
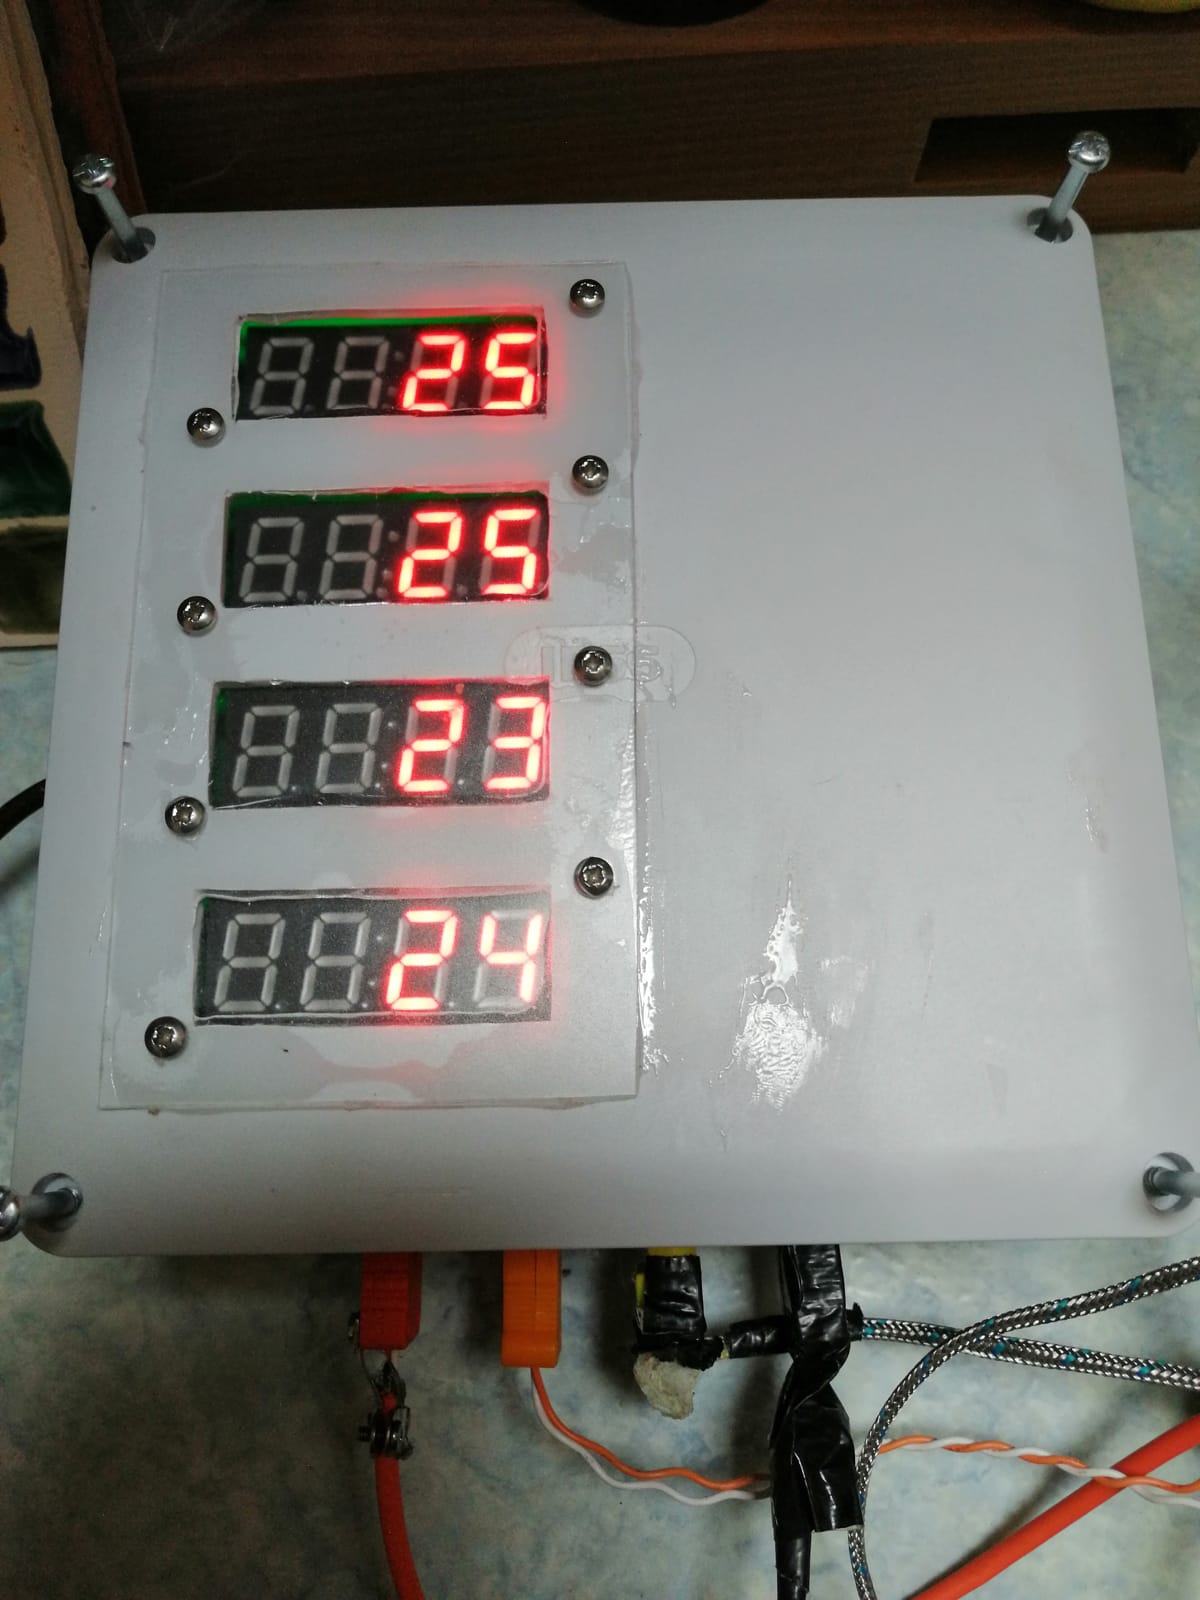
Curve visualization: Real-time display of temperature curves, with progress bars indicating the temperature for each thermocouple.
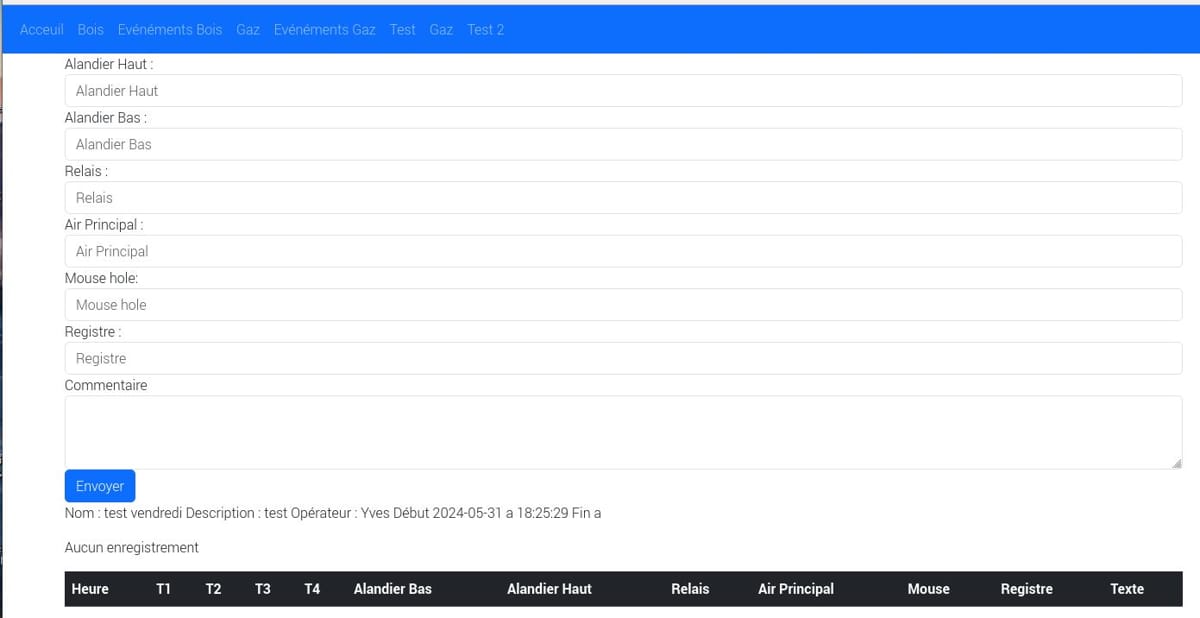
Note-taking: The interface allows adding notes, essential for analyzing firing results and making adjustments for future firings.
Historical data: The ability to compare data from different firings helps in identifying trends and improving firing processes.
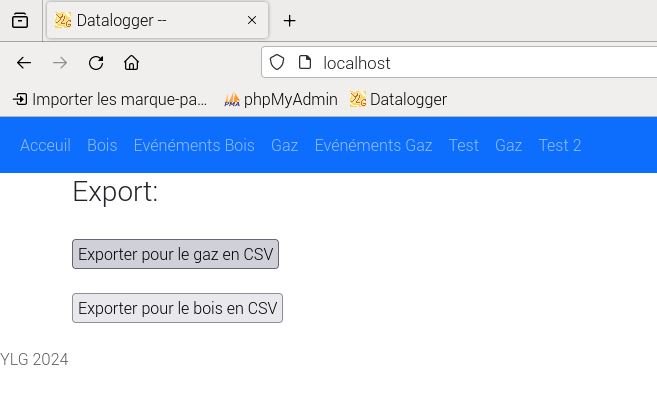
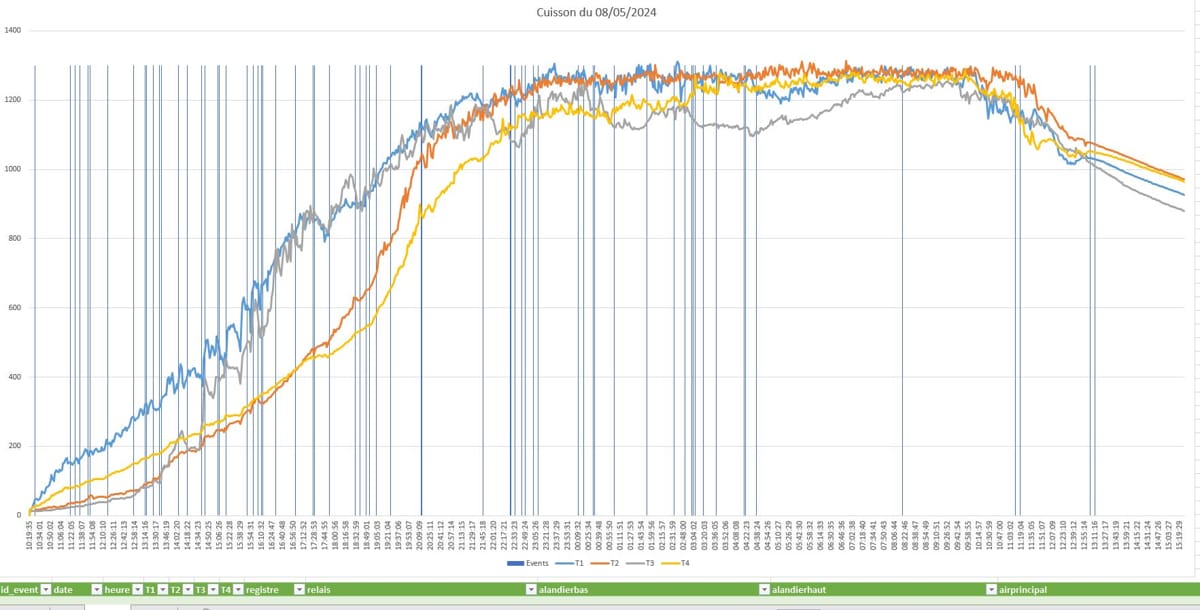
Once the firing is finished, data can be exported in .CSV for Excel and plotted as curves in Excel
Data presentation in Excel, list of values:
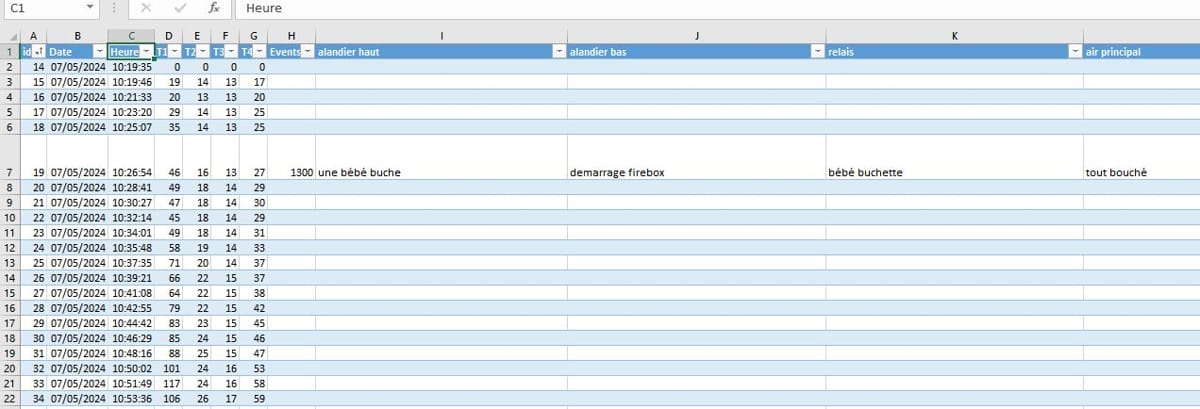
Data presentation in Excel, list of events:

Data presentation in Excel, temperature curve:
Arduino Box Wiring
Description: Assembly of a box with an Arduino, thermocouples, and a MAX31856 module to measure and record temperature in different types of kilns (wood, gas, electric).
Wiring the Arduino Mega shield with the 4 max31856 and the wires to the LEDs.
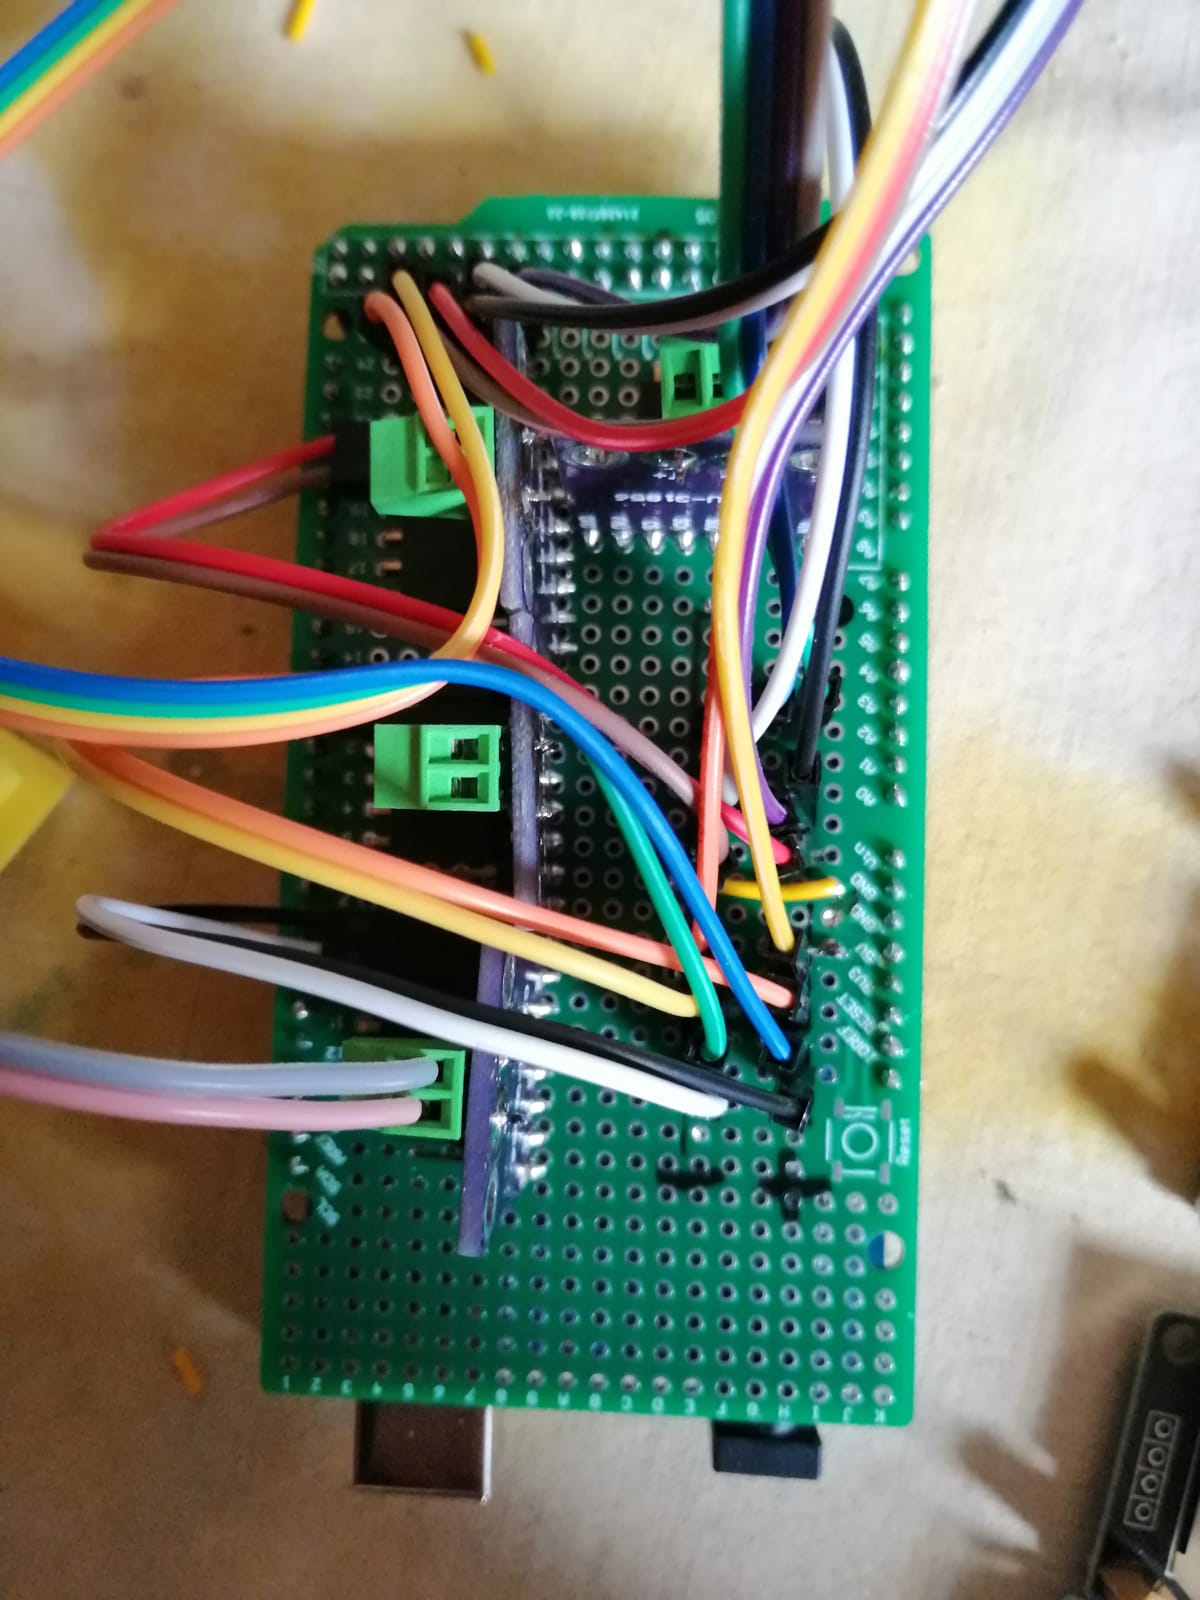
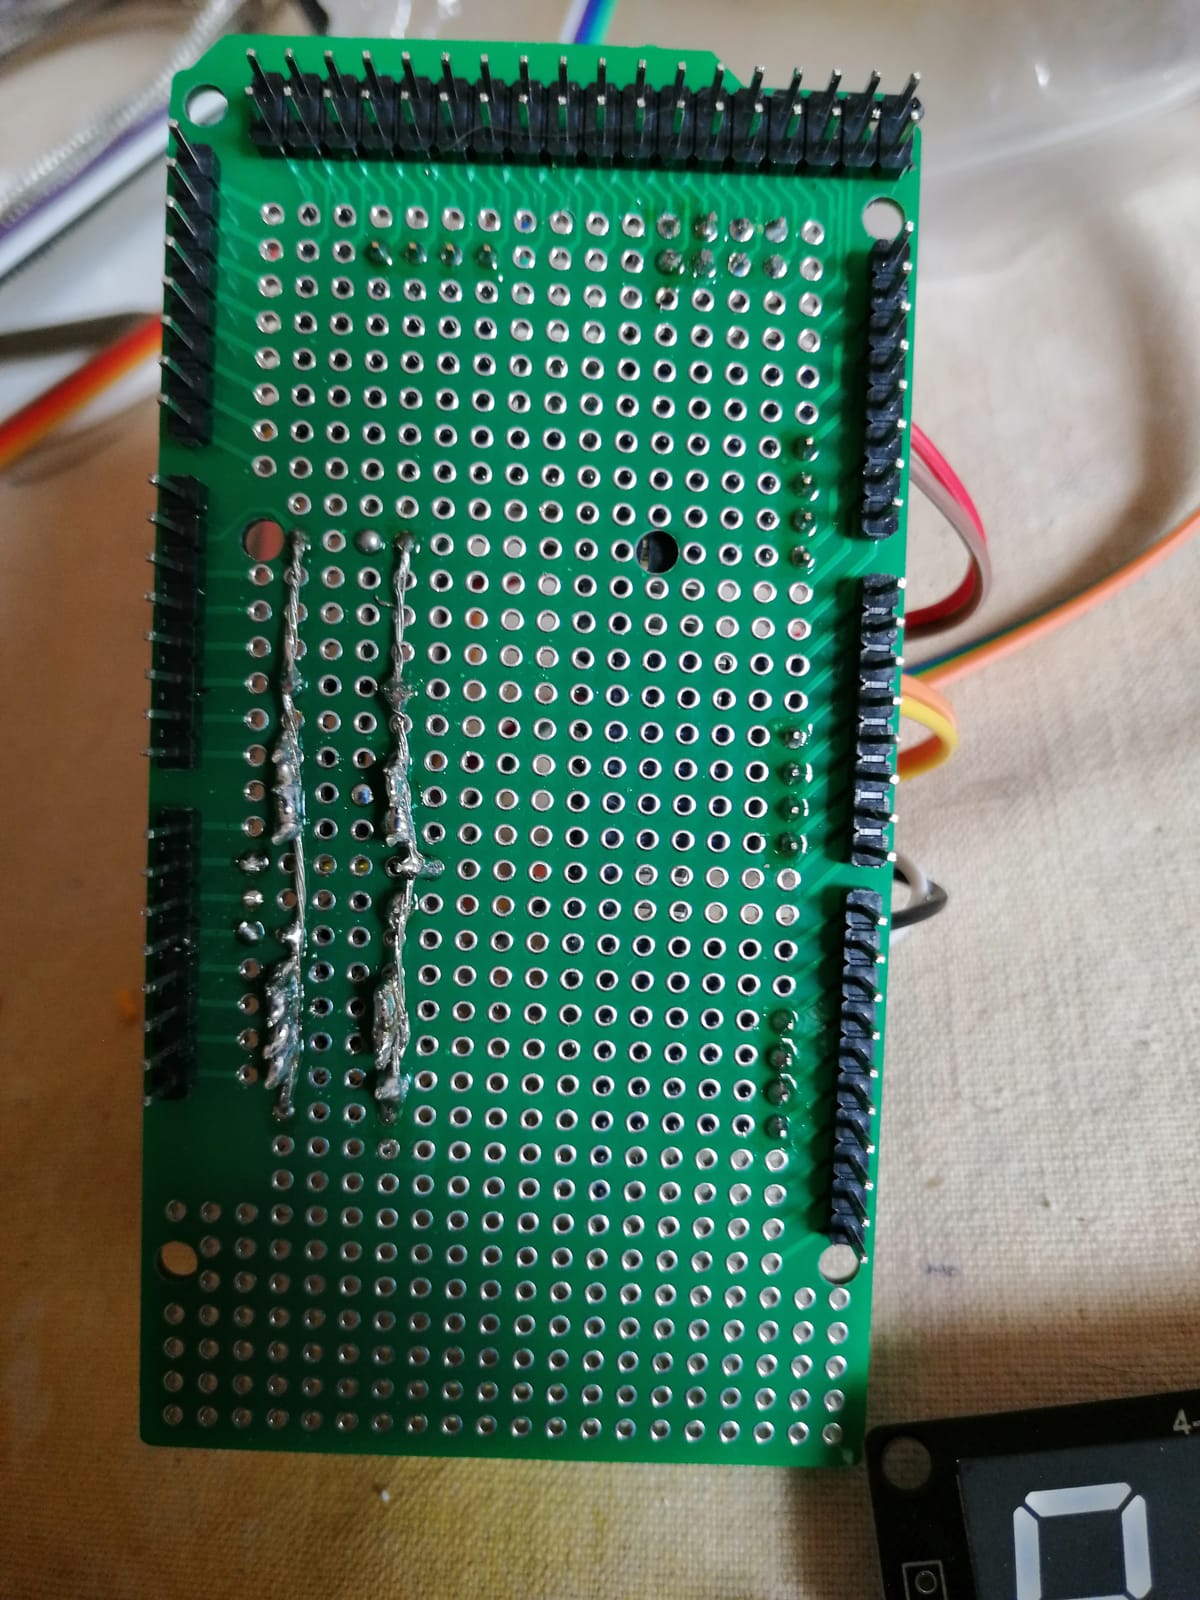
Wiring the Arduino Mega shield, PCB side view.
Wiring the thermocouple connectors.
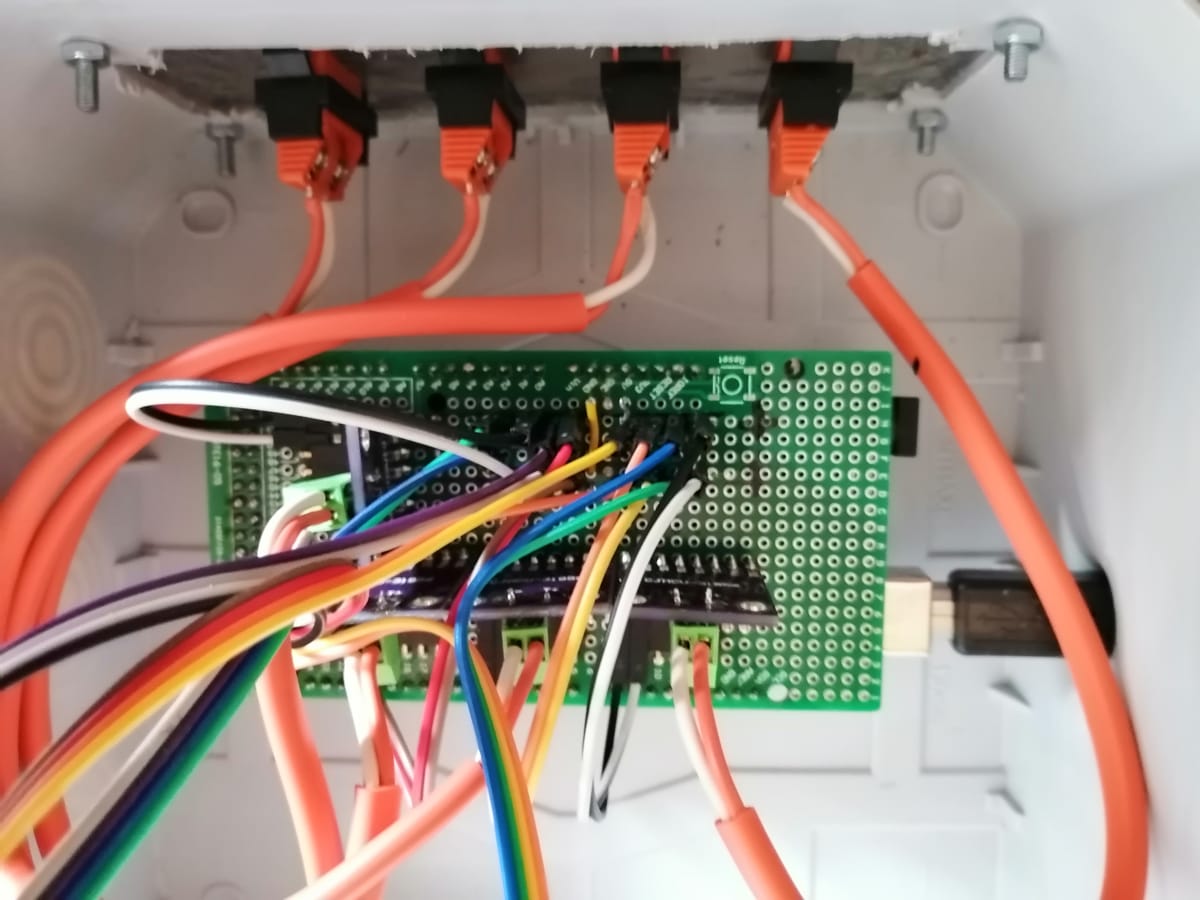
Wiring the LEDs.
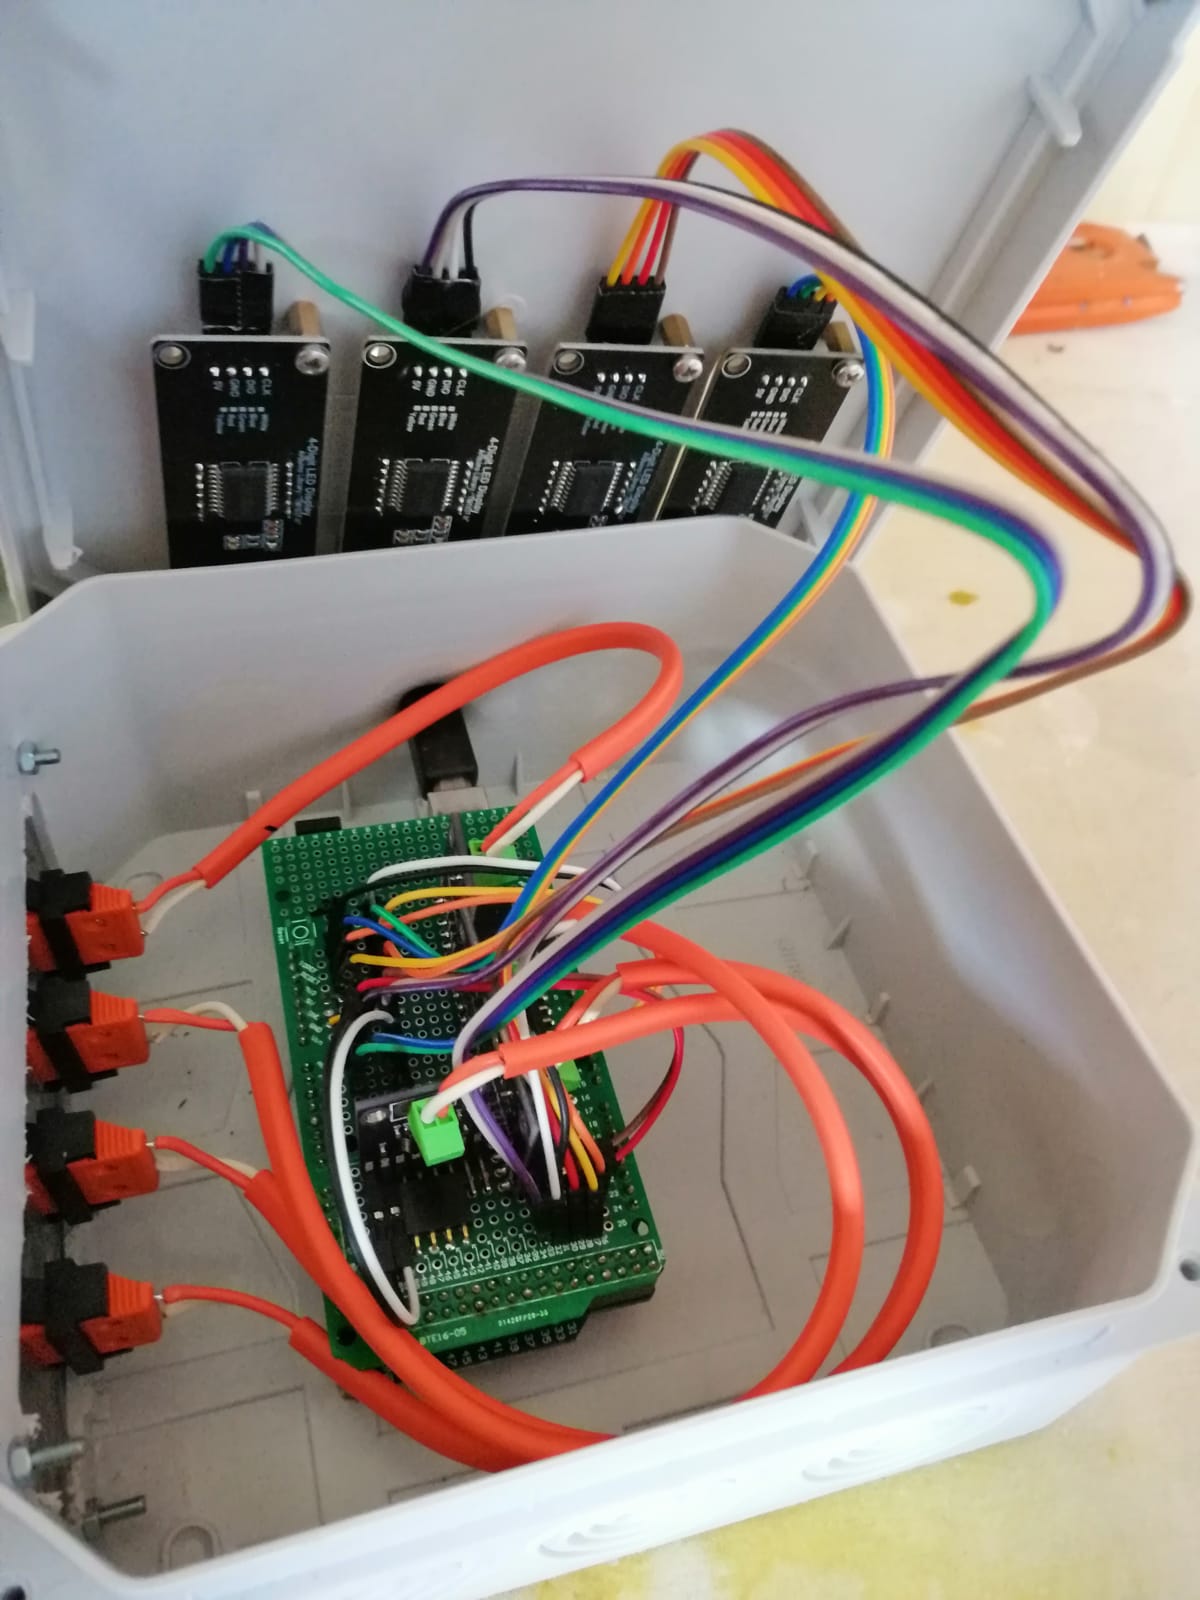
Finished box.
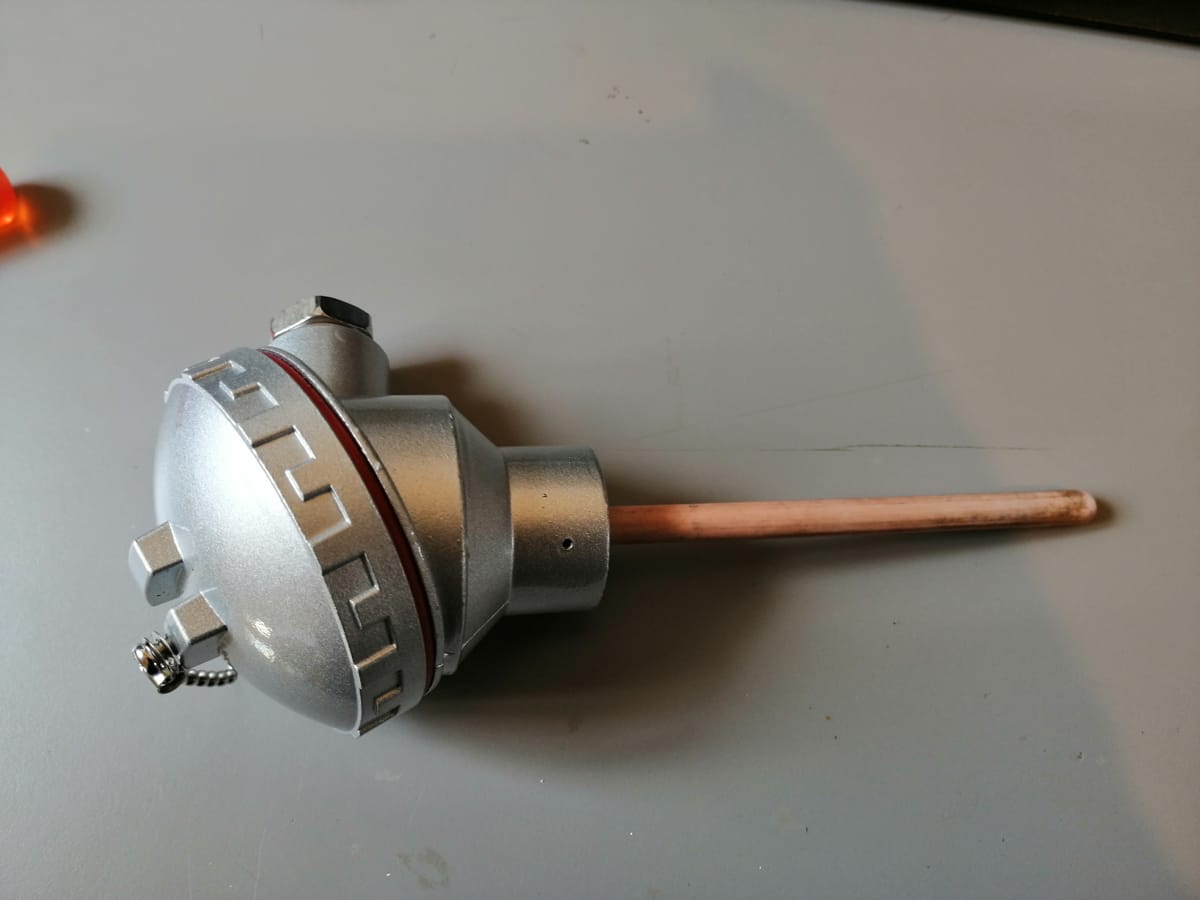
Thermocouple Assembly
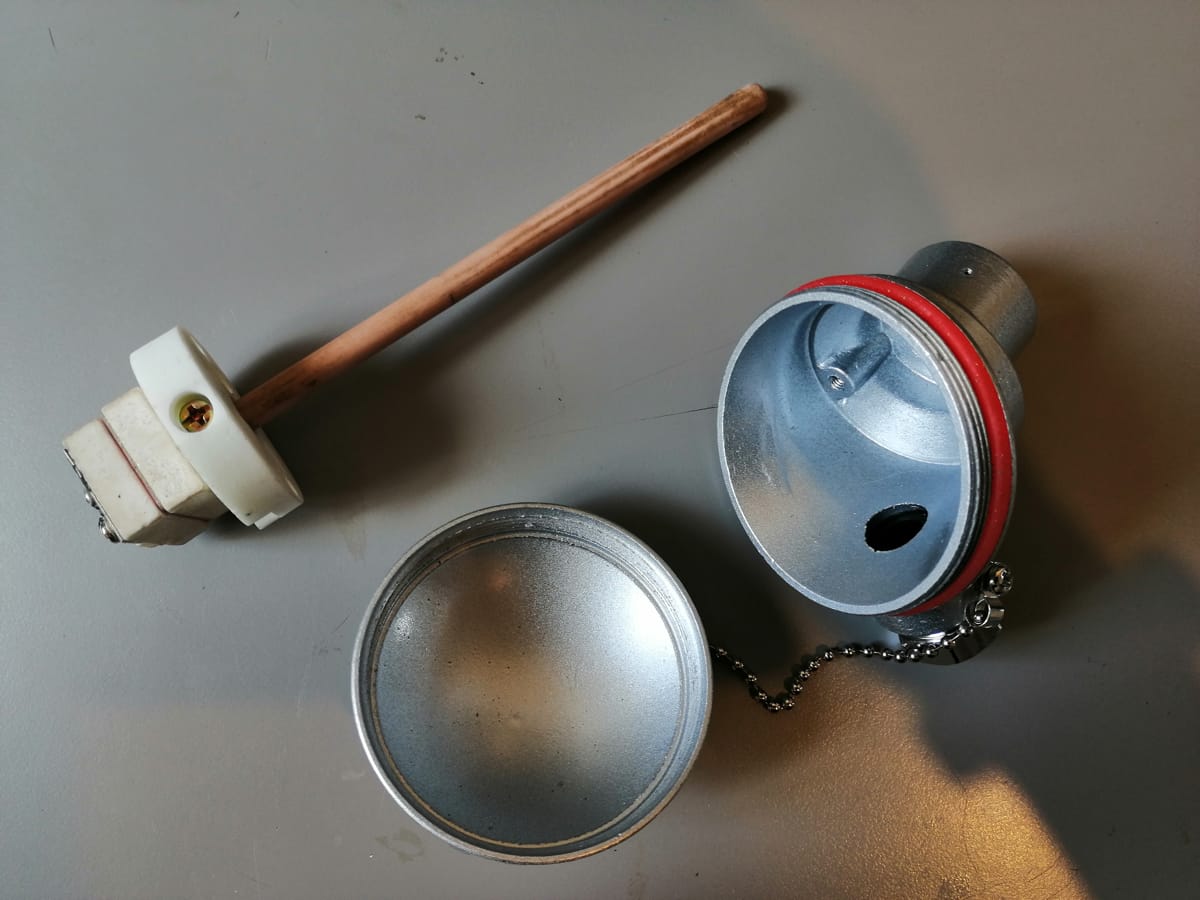
Setup and Precautions
Using a datalogger for your pottery kiln requires special attention to certain technical aspects to ensure accurate measurements and optimal durability of your equipment.
Here are some tips and precautions to keep in mind:
Fragility of the Thermocouple
The thermocouple is an essential but fragile component. It is crucial to handle it with care. A shock or blow can easily break the thermocouple, compromising the accuracy of your temperature measurements. Avoid knocking or subjecting it to mechanical stress.
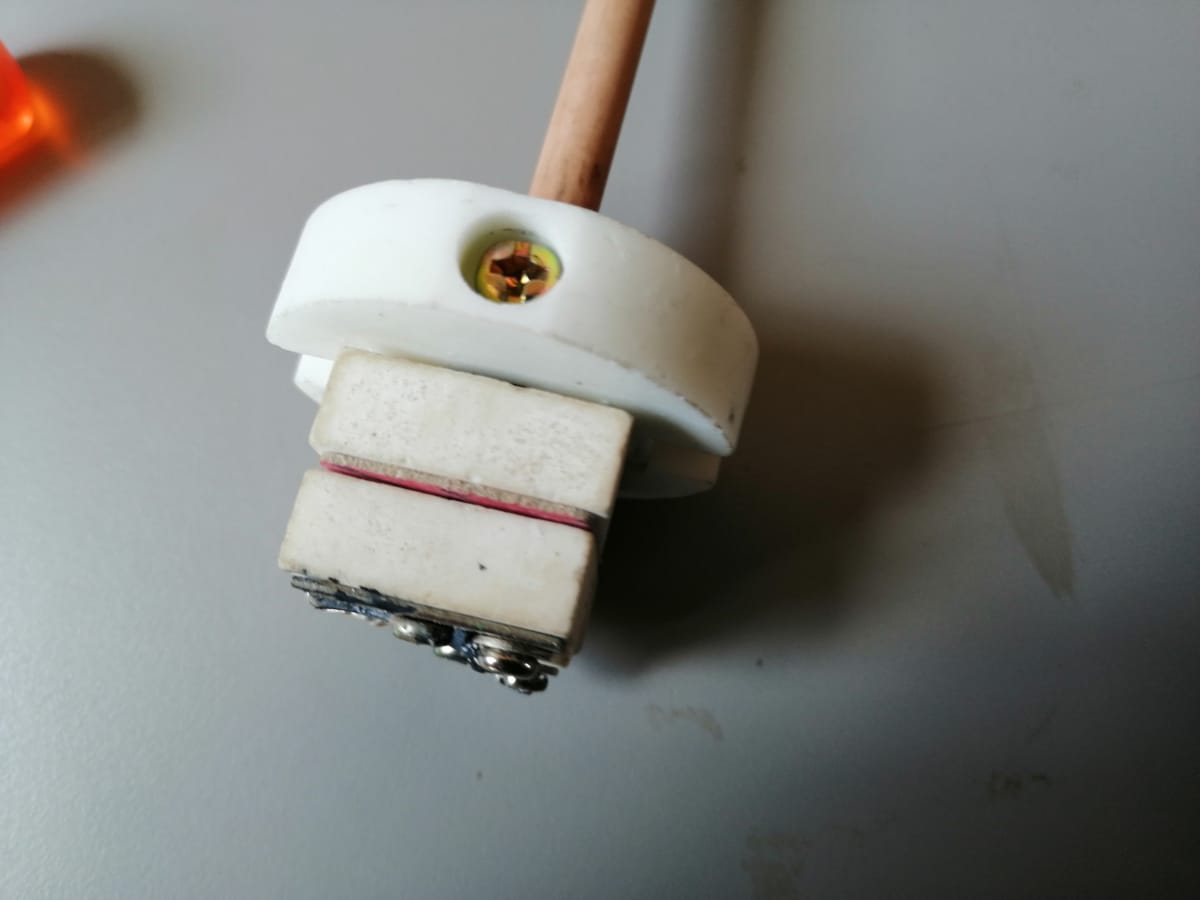
Thermocouple Wiring Precautions
The thermocouple wires are extremely thin, measuring only 0.16 mm in diameter, making them very fragile. When wiring, be delicate to avoid breaking them. Use appropriate tools and work in a stable environment to minimize the risk of damage.
Thermocouple Polarity
It is important to observe the polarity of the thermocouple when wiring. Incorrect connection can result in inaccurate temperature readings. Make sure to correctly identify the positive and negative poles and connect them properly.
Cable Type and Connector Polarity
For type S thermocouples, use a special compensation cable, usually orange. Polarity must be respected: connect the orange wire to the positive pole and the white wire to the negative pole. This ensures accurate and reliable measurements.
Special Thermocouple Connectors
Use connectors specially designed for thermocouples. These connectors ensure good electrical connection and minimize the risk of false contacts, which is crucial for obtaining accurate temperature readings.
Waterproof Box for Arduino
The box containing the Arduino must be waterproof to protect the electronic components from dust and moisture. These elements can cause short circuits or malfunctions, thus compromising the reliability of your datalogger.
Use of Shields and Soldering Wires
To avoid false contacts on the Arduino board, it is recommended to use a shield. This facilitates connections and ensures better electrical stability. Solder all wires as much as possible to guarantee solid and reliable connections, reducing the risk of accidental disconnections.
Conclusion
By following these precautions, you can ensure the longevity and reliability of your datalogger for your pottery kiln. Accurate temperature measurements and protection of your electronic components are essential for obtaining optimal and consistent results in your pottery creations.
Program:
If you wish to obtain a copy of the program files, you can download them in ZIP format to your local computer. Here’s how to do it:
- Go to the main page of the repository on GitHub.
- Above the file list, click “Code”.
- Select “Download ZIP”.
By following these steps and using these resources, you will be able to create and fully utilize a datalogger for your pottery kiln, thereby improving the quality and consistency of your creations. This guide provides not only the technical basics but also practical tips to optimize your firing processes and explore new pottery techniques.
Acknowledgements:
I would like to thank Cyril Dennery for his collaboration on this project, his patience during tests, handling of encountered bugs, and constructive exchanges. Thanks to him, I was able to realize this interesting project which I hope will benefit others.
Conclusion:
By using a datalogger for your pottery kiln, you can significantly transform and improve your firing processes.
By using a datalogger for your pottery kiln, you can significantly transform and improve your firing processes. This device not only allows you to monitor and adjust temperatures in real-time but also to analyze the results after each firing to optimize your techniques. With accessible components and an open-source design, completing this project is within reach for any hobbyist, whether beginner or experienced.
The datalogger offers the ability to note events during firing, maintain a complete history of temperature curves, and constantly monitor that everything is going well. With a simple and affordable setup, you can create a powerful tool that meets industry standards and does not rely on any proprietary software or hardware.
By properly configuring your network, you can even access your datalogger's data remotely, wherever you are. This allows for additional flexibility and peace of mind, knowing you can monitor your firings in real-time without being physically present.
Furthermore, this type of setup allows for the addition of extra sensors for even more comprehensive monitoring. For example, you can add a barometric sensor and an anemometer to measure weather conditions during firing. This can be particularly useful for understanding the impact of the environment on your results. For electric kilns, a current measurement module can also be integrated to track electricity consumption and detect potential issues.
By following the detailed steps in this article and using the provided resources, you will be well-equipped to create and use your own datalogger. In doing so, you will not only improve the quality of your creations but also develop a deeper understanding of the firing processes, opening up new possibilities for your pottery projects.
Feel free to experiment, adjust, and customize your datalogger according to your specific needs. With this technology at your disposal, the limits of your pottery creations are only defined by your imagination and expertise.
For any questions or additional assistance, do not hesitate to Cette adresse e-mail est protégée contre les robots spammeurs. Vous devez activer le JavaScript pour la visualiser.